
TM SIM Registration
You will be penalized with a fine of ₱100,000 to ₱1 million if you don’t register your TM SIM according to the SIM Registration Law. Go to the registration link below to access the form, fill it out, and get registered immediately.
You can register your SIM through the official URL or the GlobeOne App. However, you must have a valid Philippine-issued ID and be over 18 years old to register.
Registration Guide through Official URL Online
Step 1: Open your phone’s browser, Google Chrome or Safari.
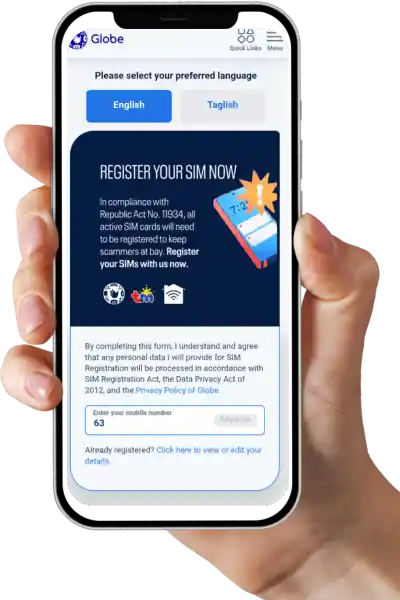
Step 2: Type the URL https://new.globe.com.ph/simreg or open the direct link below.
Step 3: On this page, click “I Accept” to agree to the use of cookies.

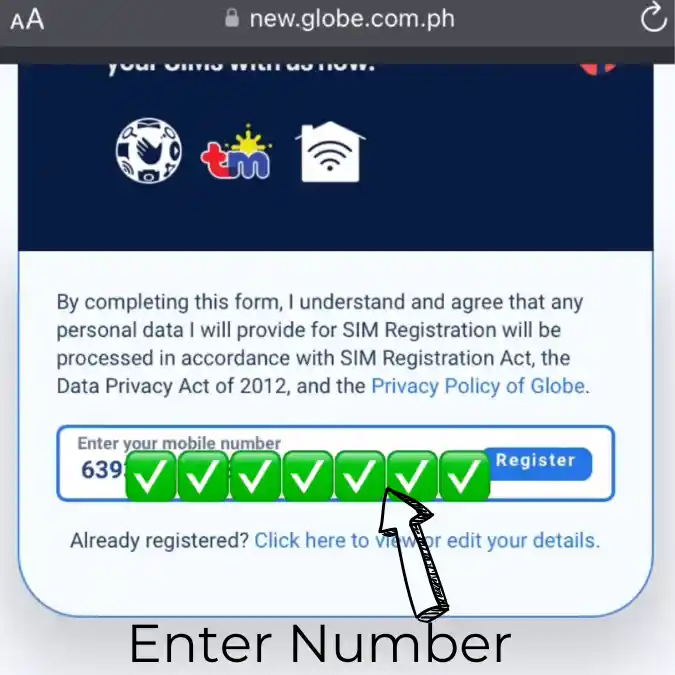
Step 3: Enter the number of your newly purchased TM SIM card.
Step 4: Next, press the “Register” button in the box.
Step 5: On the next page, you will see the list of requirements needed for registration. You must have a valid ID and supporting documents. Please note that only individuals 18 years old and above can register. If the user is under 18, an authorized representative is required.
Note: Insert your SIM properly into your mobile phone to receive the OTP; otherwise, you may encounter registration errors.
Step 6: Click on the Proceed button after reading the complete requirements.
Step 7: Enter the 6-digit PIN that was sent to your new mobile number and press Done.

Step 8: Then, you will be directed to the form where you need to fill in your details:
- Nationality
- First Name
- Middle Name
- Last Name
- Suffix (if applicable)
- Birthday
- Gender
Step 9: Make sure to fill in all fields correctly, as incomplete forms cannot be processed.

Step 9: If your unit, street, or village/subdivision is not applicable, enter “N/A” to avoid errors.
Step 10: For the province, click the dropdown arrow and select your province. Do the same for the City and Barangay. Then, enter your ZIP code and click Proceed.

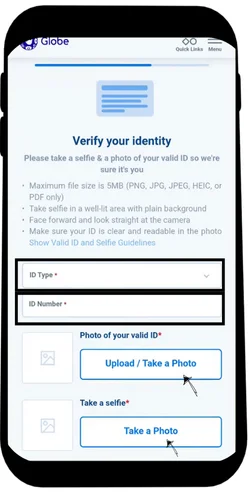
Step 11: Select the ID Type by clicking the arrow next to it, then enter your ID Number.
Step 12: Next, upload a photo of your valid ID. You can either take a new photo or upload an existing one.
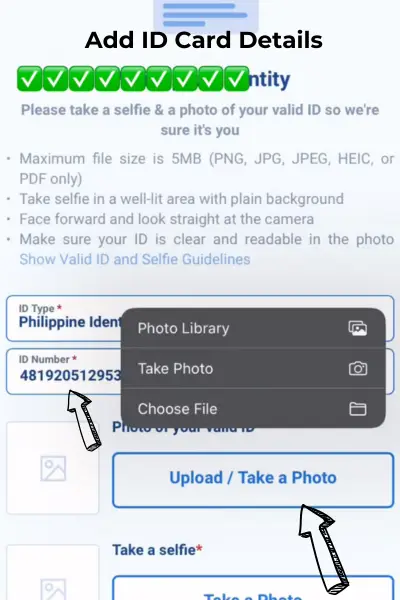
Step 13: Then, for selfie verification, click “Take a Photo” and capture a clear photo of yourself.

Final Step: After that, click Next, check the box, and press Submit.

Your registration has now been submitted! Within 24 hours, you will receive a confirmation that your SIM card has been successfully registered. if you are foreigners then you have to provide your passport IDs for sim registration
Step by Step Registration in GlobeOne App
Step 1: Simply go to the Google Play Store or App Store on your mobile phone.
Step 2: Then, click the Search bar.
Step 3: Afterward, type GlobeOne App.Step 4: Download and install the app, then open it after installation.
Note: Download the latest version of the GlobeOne App and avoid third-party applications, as they may steal your data. Globe Telecom will not be responsible for any data theft. To access the official application, click the buttons below and proceed with registration.
Download GlobeOne

Step 5: Select “Create Account”.

Step 6: Enter your TM mobile number.

Ensure the SIM card is inserted to receive the OTP via SMS.
Step 7: Enter the OTP received to verify your number.

Step 8: Create a 6-digit PIN for your account and confirm it.
Step 9: Accept the Terms and Conditions by clicking “I Agree.”

Step 10: Choose whether to enable Fingerprint Authentication or skip it.
Step 11: Assign a nickname for your account and proceed.
Step 12: Check the dashboard for the “Unregistered” status and click “Register Now.”

Step 13: Select the account or mobile number to register and click “Next.”

Step 14: Allow the app to take pictures and record videos.
Step 15: Accept the terms and verify the mobile number by entering the OTP received via SMS.

Step 16: Enter your personal details, including nationality, registration type, full name, date of birth, and sex.

Step 17: Provide your address details, including unit/house number, street, village, province, city, barangay, and ZIP code.

Step 18: Choose an ID type (e.g., National ID, Passport) and enter the ID number.
Step 19: Upload a photo of your valid ID or take a live photo (ensure the file size is under 5MB).
Step 20: Capture and upload a selfie for verification (adjust the size if necessary to meet the file size limit).
Final Steps

Step 21: Review all entered information for accuracy.
Step 22: Confirm that you are 18 years old or above and check the required box.
Step 23: Submit the registration form.
Step 24: Wait up to 24 hours for validation and save the reference code provided.
Step 25: Return to the dashboard and confirm that the SIM card status has changed to “Registered.
Requirements for Registration
You must fill in all the required details in the form according to your Philippine-issued legal ID card.
For Individual Subscribers:
- Full Name
- Birthday (as stated on your legal ID card)
- Gender
- Address (as stated on your legal ID card)
- TM Mobile Number
- Government ID with an accurate ID number
- Government ID with a photo
- Proof that all information provided is correct
For Business/Corporate Registration:
- SEC Certificate of Valid Registration
- Appointed Authorized Representative
- Board Resolution (for other juridical entities) and Special Power of Attorney
Accepted IDs for Registration
Individual Subscriber
Philippine National ID
Driver’s License
Passport
Senior Citizen’s Card
NBI Clearance
Voter’s ID
Firearms License
IBP ID
Police Clearance
OWWA ID
PRC ID
PWD Card
IBP ID
UMID Card
SSS/GSIS Card
TIN ID
Or Other valid government-issued IDs.
For Foreigners
For Visitors:
Passport identification page and visa stamp
Address verification (hotel confirmation or host declaration)
Return flight ticket
Note: SIMs registered under foreign travelers will be deactivated after 30 days.
For Residents:
Passport information page and visa document
Proof of residence
ACR I-Card (Alien Certificate of Registration)
Official identification from the visa-issuing agency
Work authorization (for employees)
Student identification card (for students)
Legal entry/admission papers (for individuals under special status)
For Corporation
Full Name of the Authorized Person
List of Contact Numbers
Official Business Name
Complete Company Address
Proof of Business Legitimacy, such as:
Partnership Agreement
Corporation Papers
Cooperative Registration
Foundation Documents
Association Certification
Government-Issued Identification (with photo and ID number)
Valid Official Identification Document
Business Registration Certificate / DTI Business Permit
Authorization Proof (Resolution or document appointing the representative)
Known Errors and Solutions
Most common errors that TM SIM users face include issues with image size, resolution and quality, and weak internet signals.
Image Size, Resolution, and Quality Solution:
When uploading your image, you may encounter an error such as “You can’t upload the image.” This usually occurs because the maximum allowed file size is 2MB. If your photo is larger than 2MB (e.g., 3MB), you need to reduce its size. Accepted formats include PNG, JPG, HEIC, or PDF. Make sure your selected ID is not blurred or cropped.
Weak Internet Signal Solution:
At times, you may not receive your OTP due to a weak SIM signal. You might also experience issues such as the “Next” button not working or the form failing to submit even after filling it out completely. These problems are typically caused by weak signal strength or poor internet connectivity.
To avoid these issues, try to visit a Globe/TM 5G area where the network is stronger and more stable. To find the nearest 5G area, click the button below to view the complete list.
Important Tip: Before starting the registration process, make sure to clear your browser’s cookies and cache. This will help ensure a smoother experience.
FREQUENTLTY ASKED QUESTIONS
Official Contact for Registration Concerns
If you have any concerns about registration, you may contact officials using any of the following channels: